

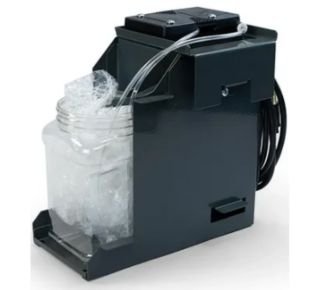
Efficiently Manage Your Coolant with the Zebra Style Haas Coolant Oil Skimmer
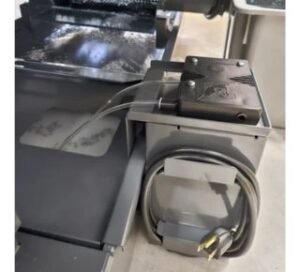
Harness the power of our Zebra Style Haas CNC coolant tank oil skimmer and witness a substantial improvement in your machinery’s performance. Featuring a RoHS certified motor operating at 7 rpm and equipped with a generous 25 ft. extension cord, this unit is fully compatible with Haas CNC machines possessing an external coolant tank capacity of 55 or 95 gallons.
Your purchase includes :
- Highly Efficient Oil Skimmer Cartridge: This cartridge, equivalent to the ones used in our renowned Zebra® Tube Skimmers.
- Clear Plastic Oil Container: Provides a convenient way to capture and dispose of skimmed oil, enabling easy maintenance and cleanliness.
- Clamp Kit: Securely attach the skimmer to your machine with any of the assorted clamping accessories.
- 14″ Industrial Grade Tubing: This high-quality tubing, identical to the ones utilized in our Zebra Sidewinder™ Tube Skimmers.
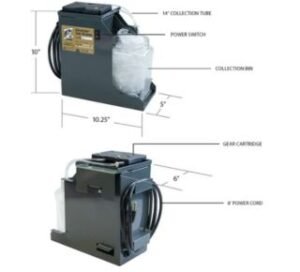
Zebra Style Haas Coolant Oil Skimmer Model
Zebra Style Haas Coolant Oil Skimmer Product Specifications
| Skimmer Type : | Tube Skimmer |
| Reach : | 14″ |
| Motor Speed | 7 rpm @ .11HP |
| Manufactured Origin : | USA |
| Skimming Capacity : | 1 quart per hour |
| Motor : | 60 Hz |
| Max Operating Temperature : | 30ºC / 90ºF |
| Frequency / Voltage : | 60 Hz / 120 V |
| Warranty : | Lifetime |
Switch Replacement Instructions for Sidewinder® Tube Skimmers
REPLACEMENT INSTRUCTIONS :
1) Unplug the unit from any power source. WARNING! Switch should not be worked on with the unit plugged into any power source. The risk of electrical shock exists.
2) Remove the top of the unit by removing two (2) black screws.
3) Locate three (3) prong switch connections (A) as noted in (Figure 1). Disconnect using needle nose pliers.
4) REMOVE FAILED SWITCH BY PRYING LOCKING TABS AWAY. PLEASE NOTE THE ORIENTATION OF THE CONNECTIONS ON THE OLD SWITCH.
5) Install new switch with connections oriented the following way.
a) The silver connector will be the closest to the motor (white wire).
b) Connect motor wire next to copper connector.
c) The final connection is the Powerline cord to be connected to the gold tab.
d) Insert switch back into metal case and lock in place with tabs.
6) Plug the unit into a power supply and verify the switch is working. Once confirmed, reassemble unit by replacing the cover and screws.
Read more : Tramp Oil Belt Skimmer Model And Specification